
How to Set Up an Email Signature in Android
Overview: How to Set Up an Email Signature in Android
This guide explains How to Set Up an Email Signature in Android step‑by‑step and why it matters for security, uptime, and performance. It’s written for small and medium businesses that rely on Blackhawk MSP for proactive, managed IT support in the Bay Area and beyond.
- ✅ Clear, actionable steps
- ✅ Best‑practice notes from our MSP engineers
- ✅ Links to related services and help
Tip: If you’re short on time, contact us — we’ll handle this for you and verify everything is working.
We hope you have already read our tutorial on How to Set Up a cPanel Email Account in Android, and you have already added a built-in email widget to your Android screen.
The built-in Android email application allows us to set a custom email signature, which displays at the end of your email.
1. Open the Inbox or Gmail Application.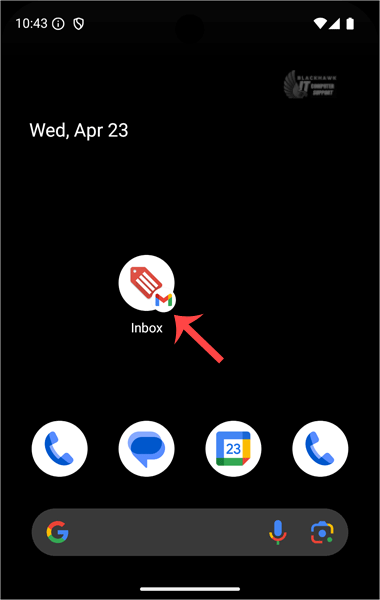
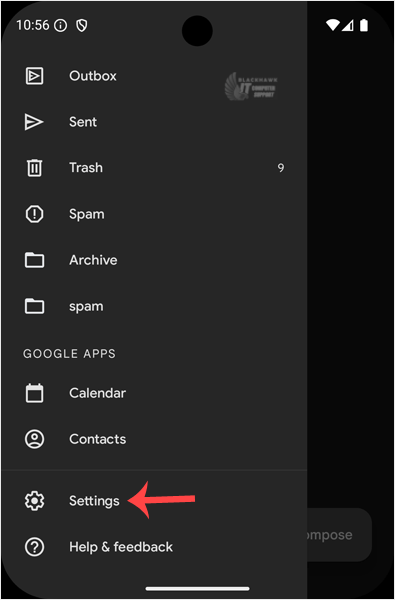
2. On the top left, tap on Menu. Scroll down to the bottom and then tap on Settings.
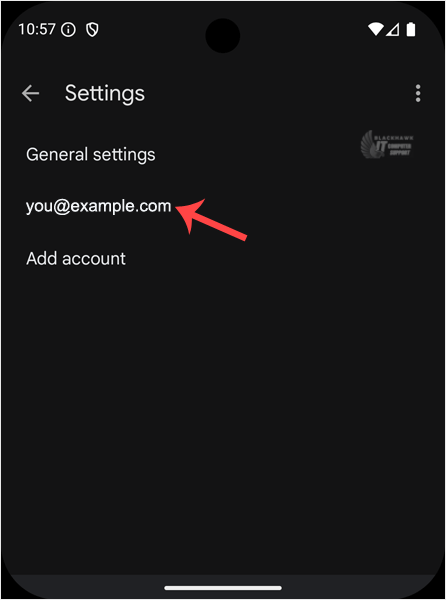
3. Select your email account. If you have multiple accounts, you can set different signatures for each one.
4. Tap on Mobile Signature. 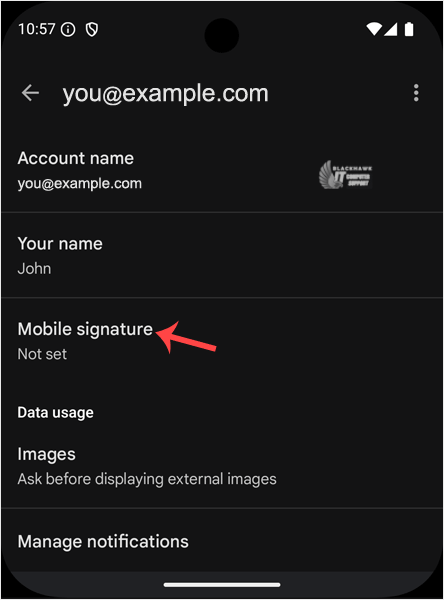
5. Set up your customized signature and then confirm with OK. 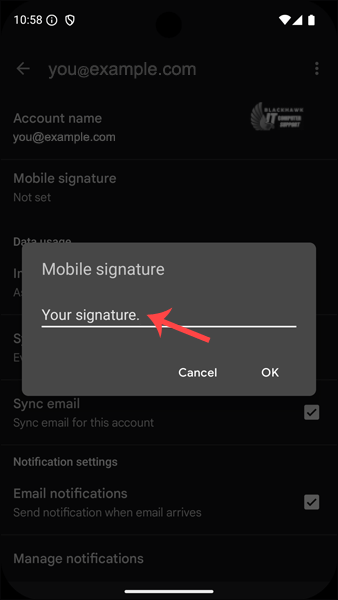
Now, whenever you send an email or reply to one, the signature will be automatically added at the end of your email.
Video tutorial temporarily unavailable while we refresh links. If you need more help, please call us at 1-925-218-4000.
Need help? Blackhawk MSP can do this for you, verify success, and document the change. Call 1‑925‑218‑4000 or open a ticket.