
How to Enable or Disable PPP in SolusVM 2
Overview: How to Enable or Disable PPP in SolusVM 2
This guide explains How to Enable or Disable PPP in SolusVM 2 step‑by‑step and why it matters for security, uptime, and performance. It’s written for small and medium businesses that rely on Blackhawk MSP for proactive, managed IT support in the Bay Area and beyond.
- ✅ Clear, actionable steps
- ✅ Best‑practice notes from our MSP engineers
- ✅ Links to related services and help
Tip: If you’re short on time, contact us — we’ll handle this for you and verify everything is working.
PPP means Point-to-Point Protocol. It is mainly used for older types of VPNs like PPTP. When PPP is enabled, it allows your VPS to send and receive data securely over that connection. If you do not have such use then you can keep it stay disabled.
1. Log in to your SolusVM 2 Control Panel.
2. Under Projects, click on the project that contains your VPS.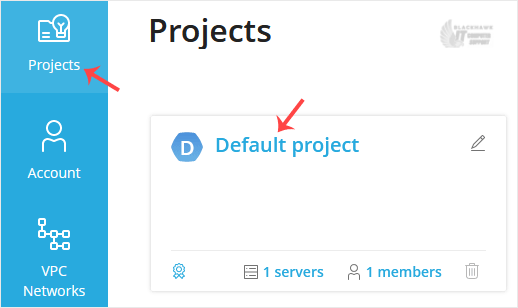
3. Click on the appropriate VPS.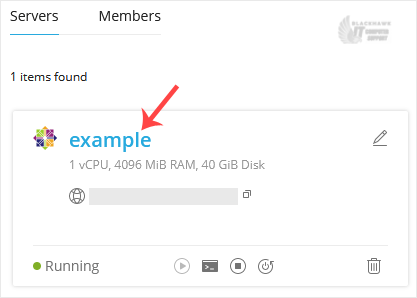
4. Click on the Settings tab.
5. Toggle PPP to enable it, then click Change to proceed.

6. After making changes, reboot your VPS.
To disable PPP, simply toggle it off and restart your VPS.
Now you know how to enable or disable PPP in SolusVM 2.
Video tutorial temporarily unavailable while we refresh links. If you need more help, please call us at 1-925-218-4000.
Need help? Blackhawk MSP can do this for you, verify success, and document the change. Call 1‑925‑218‑4000 or open a ticket.